Minimum Version Required: 22.01
Steps
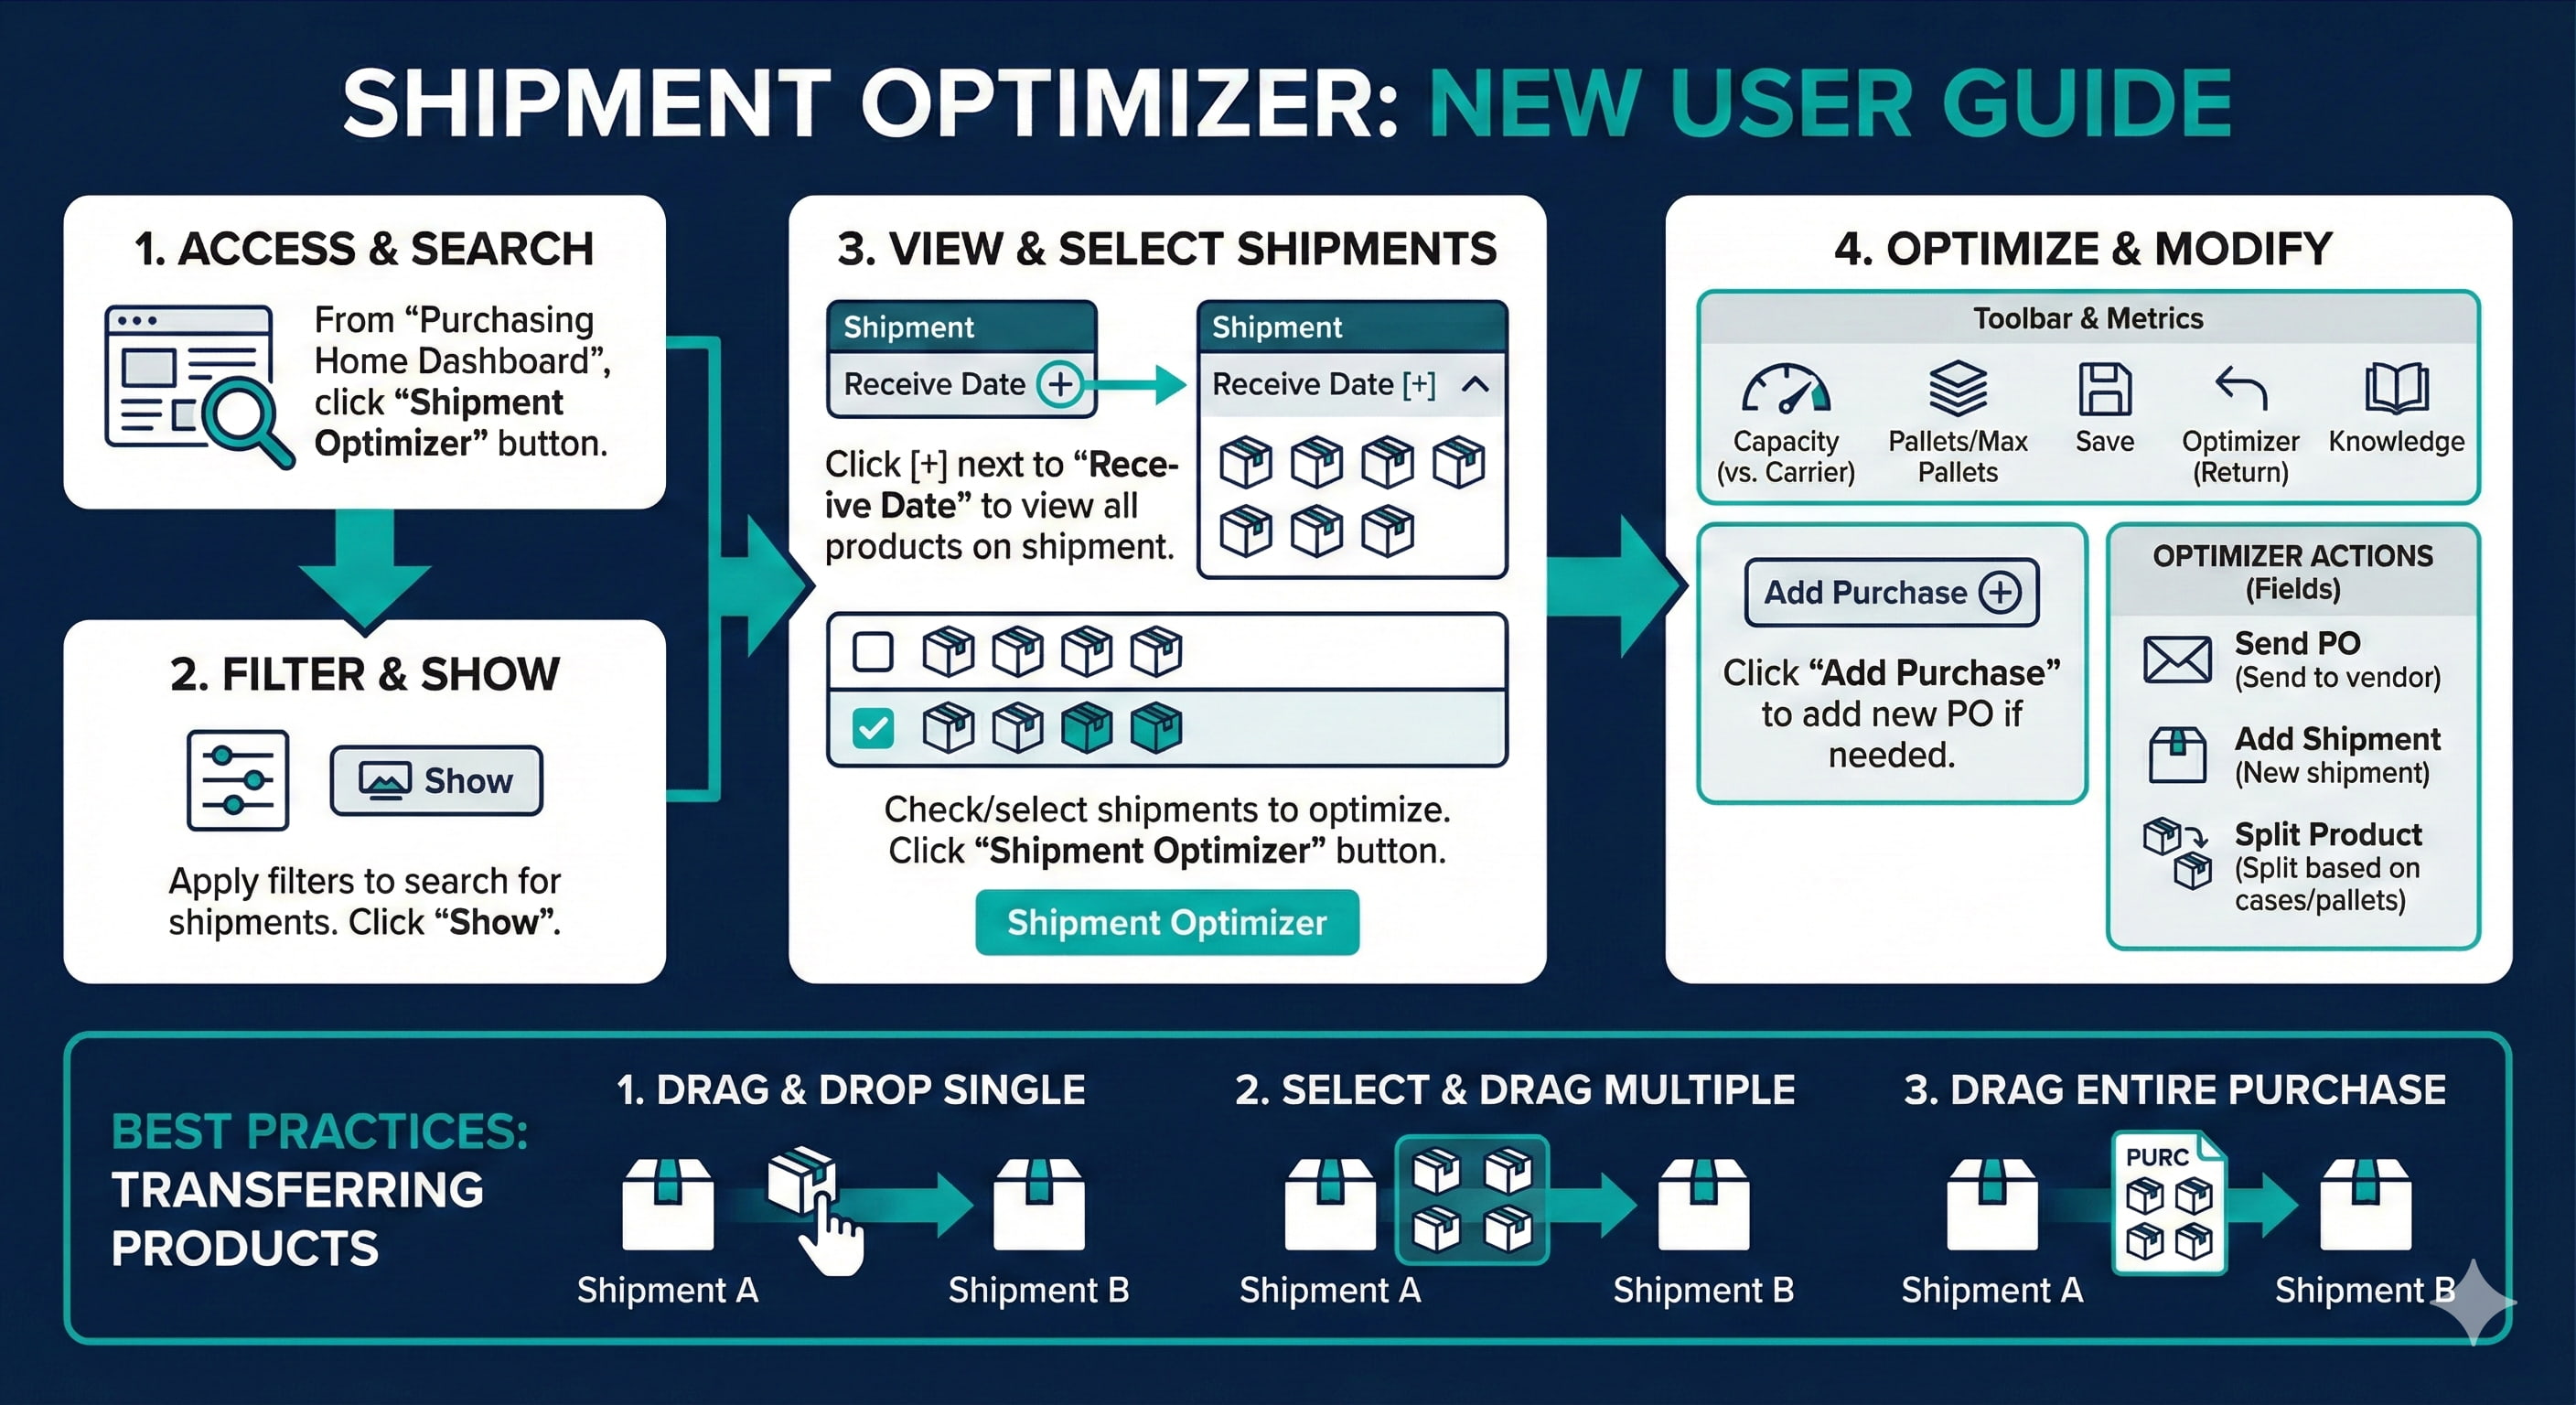
Guide to Shipment Optimizer
1. Using Universal Search, navigate to the Purchasing Home dashboard
2. Click the 'Shipment Optimizer'
3. Apply filters to search for available shipments then click Show.
4. Click the '+' expand button next to the Receive Date to view all products on the selected shipment.
5. Check or select the shipments to optimize then click Shipment Optimizer.
5. Click the Add Purchase button to add a new purchase order to the selected shipment if needed.
Fields And Definitions
Shipment Optimizer - Perform optimization tasks on selected Products
Send PO - Send purchase order to the selected vendor
Knowledge - Access the latest knowledge article on shipment optimization
Capacity - This column shows how close to the carrying capacity the selected shipment is relative to its carrier
Pallets/Max Pallets - This column shows the number of pallets on the selected shipment versus the max pallet capacity of its carrier
Save - Save all shipment configuration changes
Optimizer - Return to the previous optimizer menu
Add Shipment - Add a new shipment
Pallets/Split Product - Split a selected product in two, based on X number of cases or pallets
Knowledge - Access the latest knowledge document on shipment optimization
Best Practices
Methods to Transfer Products Between Shipments
1. Click and drag a product between shipments
2. Select multiple products at once to transfer
3. Drag and drop the entire purchase, along with all its products