Minimum Version Required: 22.01
Steps
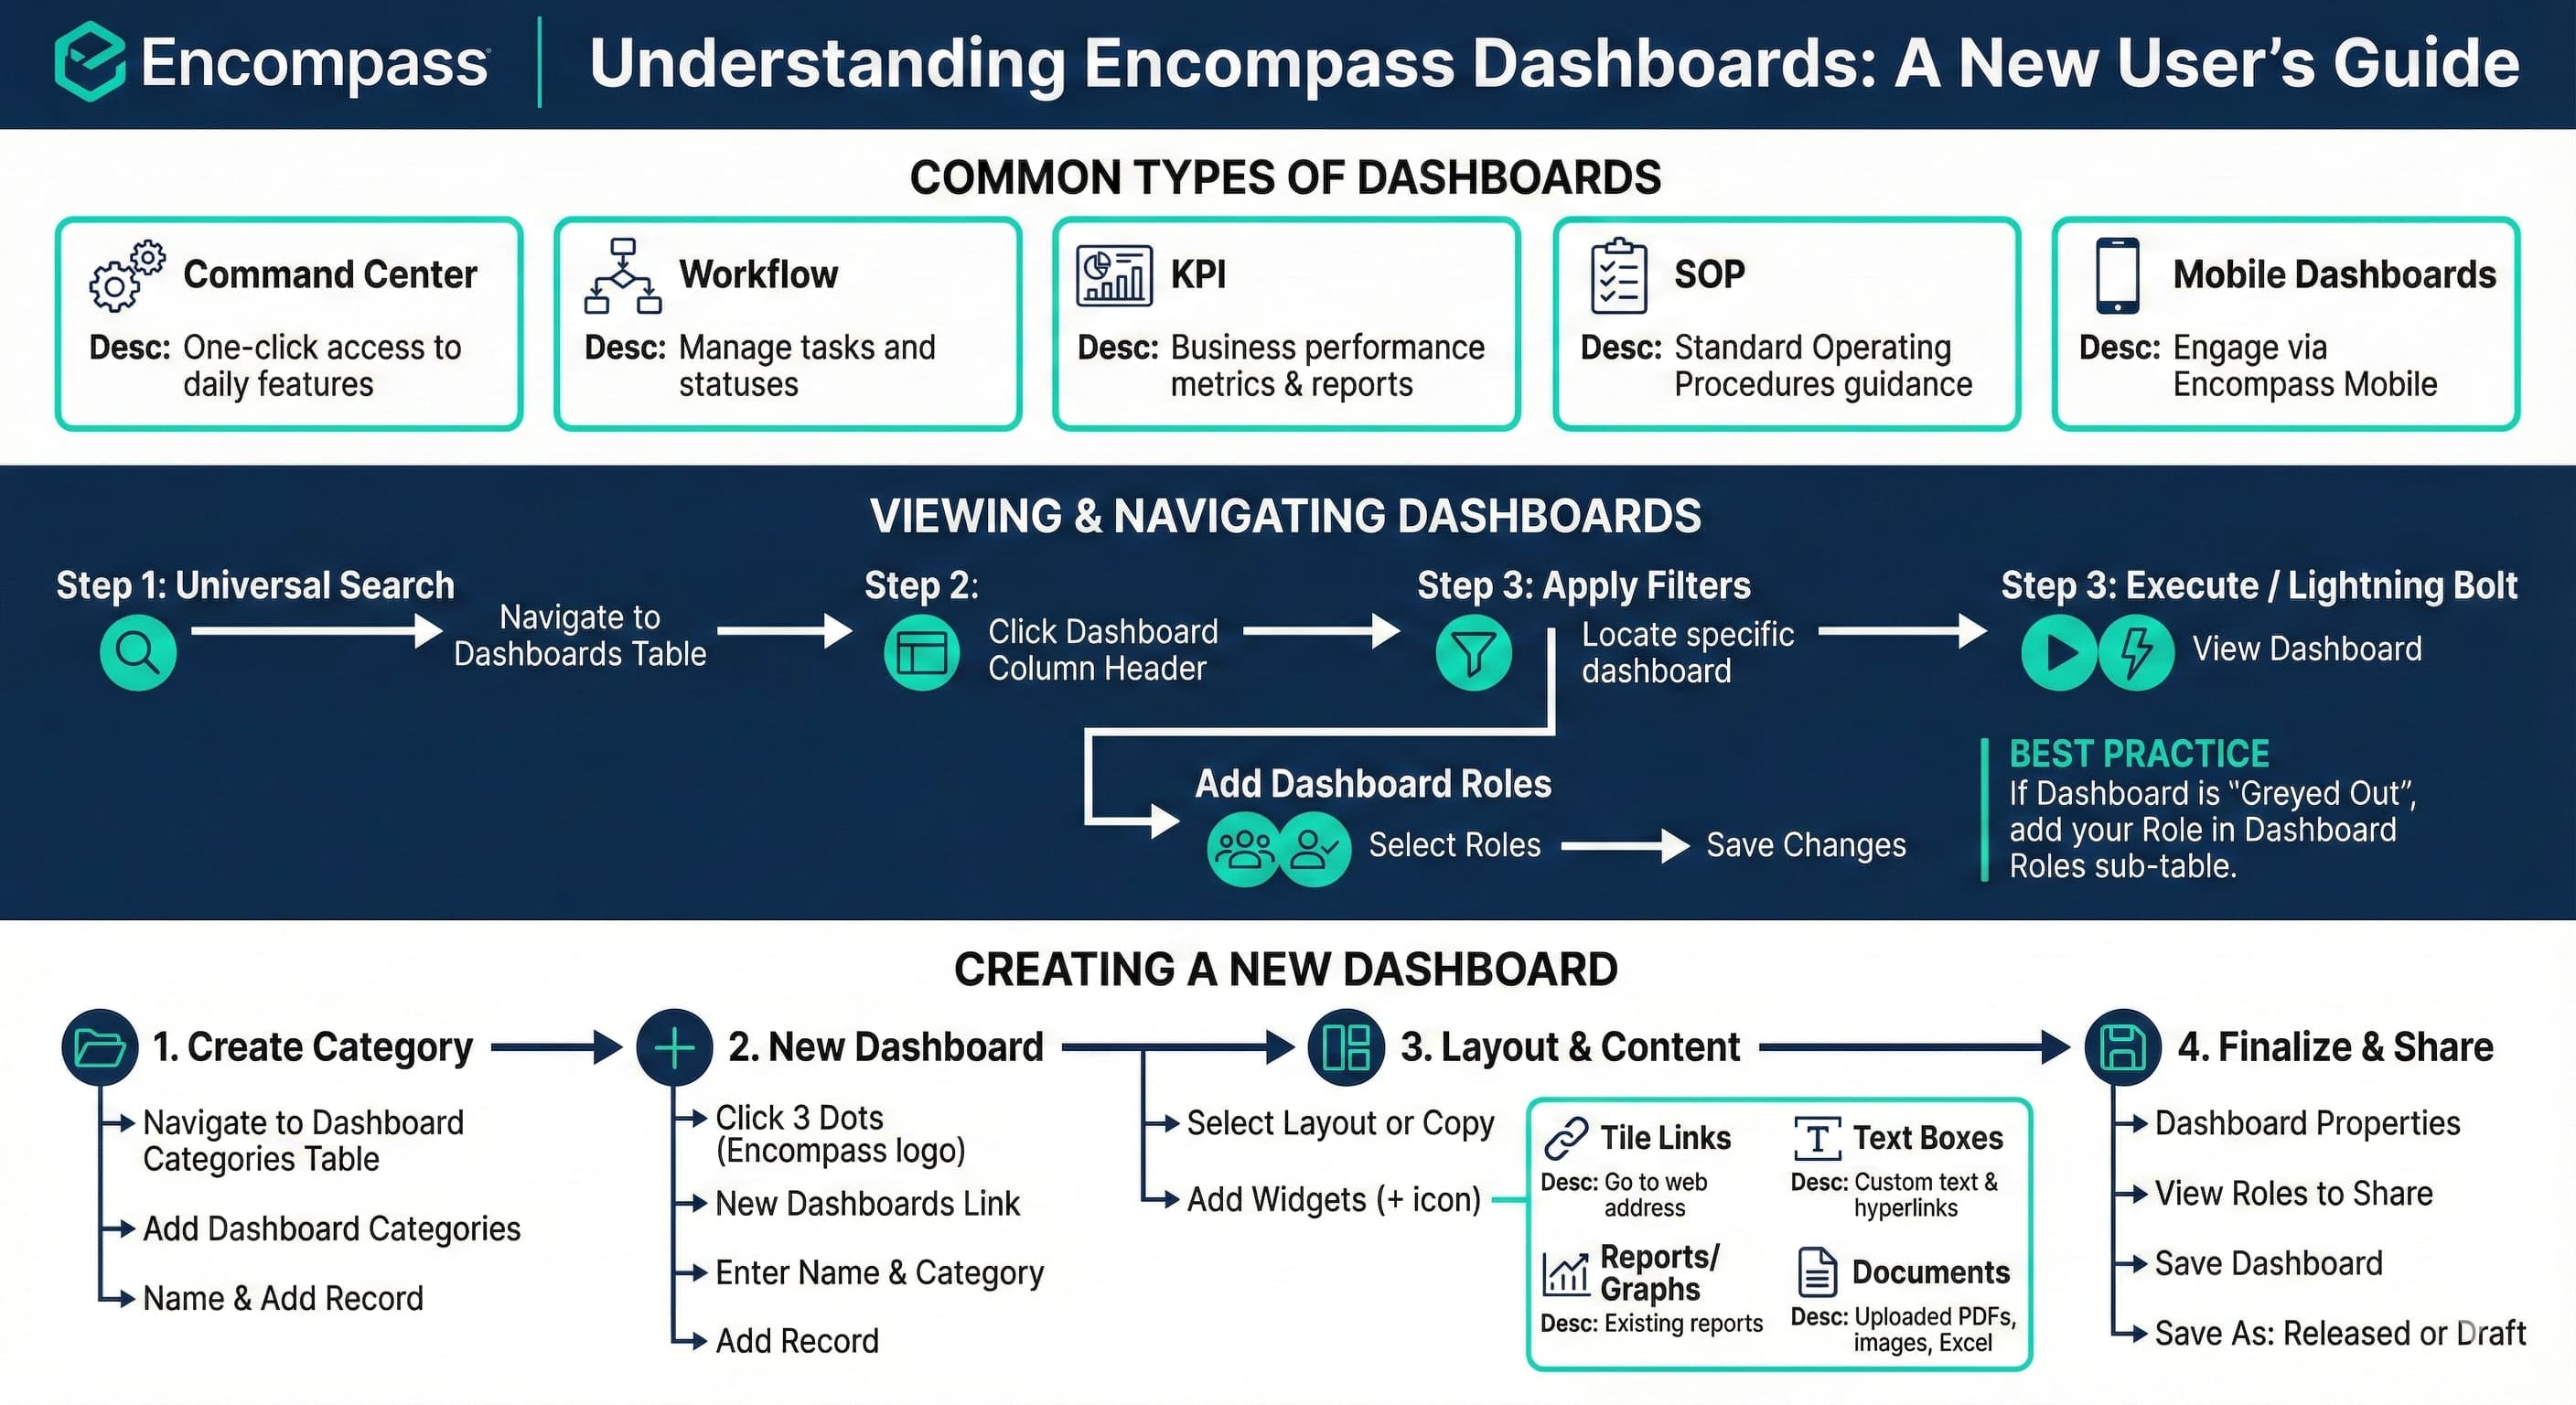
Dashboards Overview
Common Types of Dashboards:
Command Center - One click away from every feature you work with on a daily basis.
Workflow - Manage tasks - easy access to Tasks in various statuses.
KPI - Use reports and images to demonstrate business performance and metrics.
SOP - Standard Operating Procedures to guide users through their day as well as manage exceptions.
Mobile Dashboards - Engage users via Encompass Mobile.
View Dashboard Records
1. Use Universal search to navigate to the Dashboards table
2. Click the Dashboard column header
3. Apply filters to column headers to locate a specific dashboard
4. View Dashboards Roles from the Sub Tables menu. Dashboard Roles are required for Users to be able to access a dashboard.
5. Click the Add Dashboards Roles Sub Table button and select Roles in the list provided. Click the Save Changes button when complete
6. Dashboards are organized in a two-level hierarchy: Dashboard SubCategories and Dashboards
a. The Dashboard Category field defines the new or existing side panel grouping the Dashboard is displayed under
b. The Dashboard Sub Category groups dashboards under the category header in a tabbed page view

c. The Dashboard Sequence orders the dashboard in a tabbed page view. When Sequence is set to 0, Dashboards are sequenced alphabetically by name.
7. To view a Dashboard from the Dashboards table or record, click the Execute button or Lightning Bolt icon.
How to Create a Dashboard Category
Dashboards require a Dashboard Category. The Dashboard Cateogy allows the Dashboard to display within a category in the left-hand navigation panel. Use an existing Dashboard Category or create a new one.
1. Navigate to the Dashboard Categories Table using the Universal Search bar.
2. Click the Add Dashboard Categories button.
3. Add a Dashboard Category name and click Add Record.
How to Create a New Dashboard
1. From the left-hand navigation menu, click the 3 vertical dots next to the Encompass logo. Click the New Dashboards link.
2. Enter a Dashboard Name and select a Dashboard Category.
3. Click the Add Record button.
4. Select a dashboard layout from available layouts or copy an existing dashboard layout in the Copy Dashboard tab.
a. If creating from a layout, all templates have a series of rows and columns.
b. Click the + in a section to browse widgets to fill the rows and columns with useful information such as report graphs, text, links, tables, and more. Or, click the Add Widgets button.
c. The most frequently used Dashboard Items are Text Boxes and Tile Links.
i. Tile Links allow users to click and go to a web address, either inside Encompass or to an external site.
ii. Text Boxes allow users to enter custom text and control the Font Size, Color, Alignment, and add hyperlinks in a Text Box.
d. Reports can be added if the report already exists and can also be added as a graph using the Report Graph item.
e. Documents such as images, PDFs, and Excel documents must already be uploaded to Global Documents and can be selected by the document search.
- There is a Manage Documents button within the file upload dialog box. This will redirect to the Global Documents table where documents can be uploaded.
5. Add the desired information that you would like to display on your dashboard and then click Save Changes.
6. After creating and editing your Dashboard:
a. Click Dashboard Properties - Dashboard Properties determine the underlying information of the dashboard and which users can view it.Here you can change the name, category, start and end date, and even the permissions needed to view the dashboard.
b. Select View Roles to share the dashboard with other users.
c. Click Save Dashboard, and click Save As: Released (Slower) or Draft.
Best Practices
If the Dashboard is 'Greyed Out' when searching in the Universal Search bar, this indicates that your Role is not assigned on the Dashboard Roles table. You will not be able to view/access the dashboard until a Dashboard Role is added.
Navigate to the Dashboards table -> Click Subtables -> Dashboard Roles -> Add Dashboard Roles -> Select Roles -> Save Changes