Minimum Version Required: 22.01
Pre-Conditions
Enable OAuth under System Setting 409.
Steps
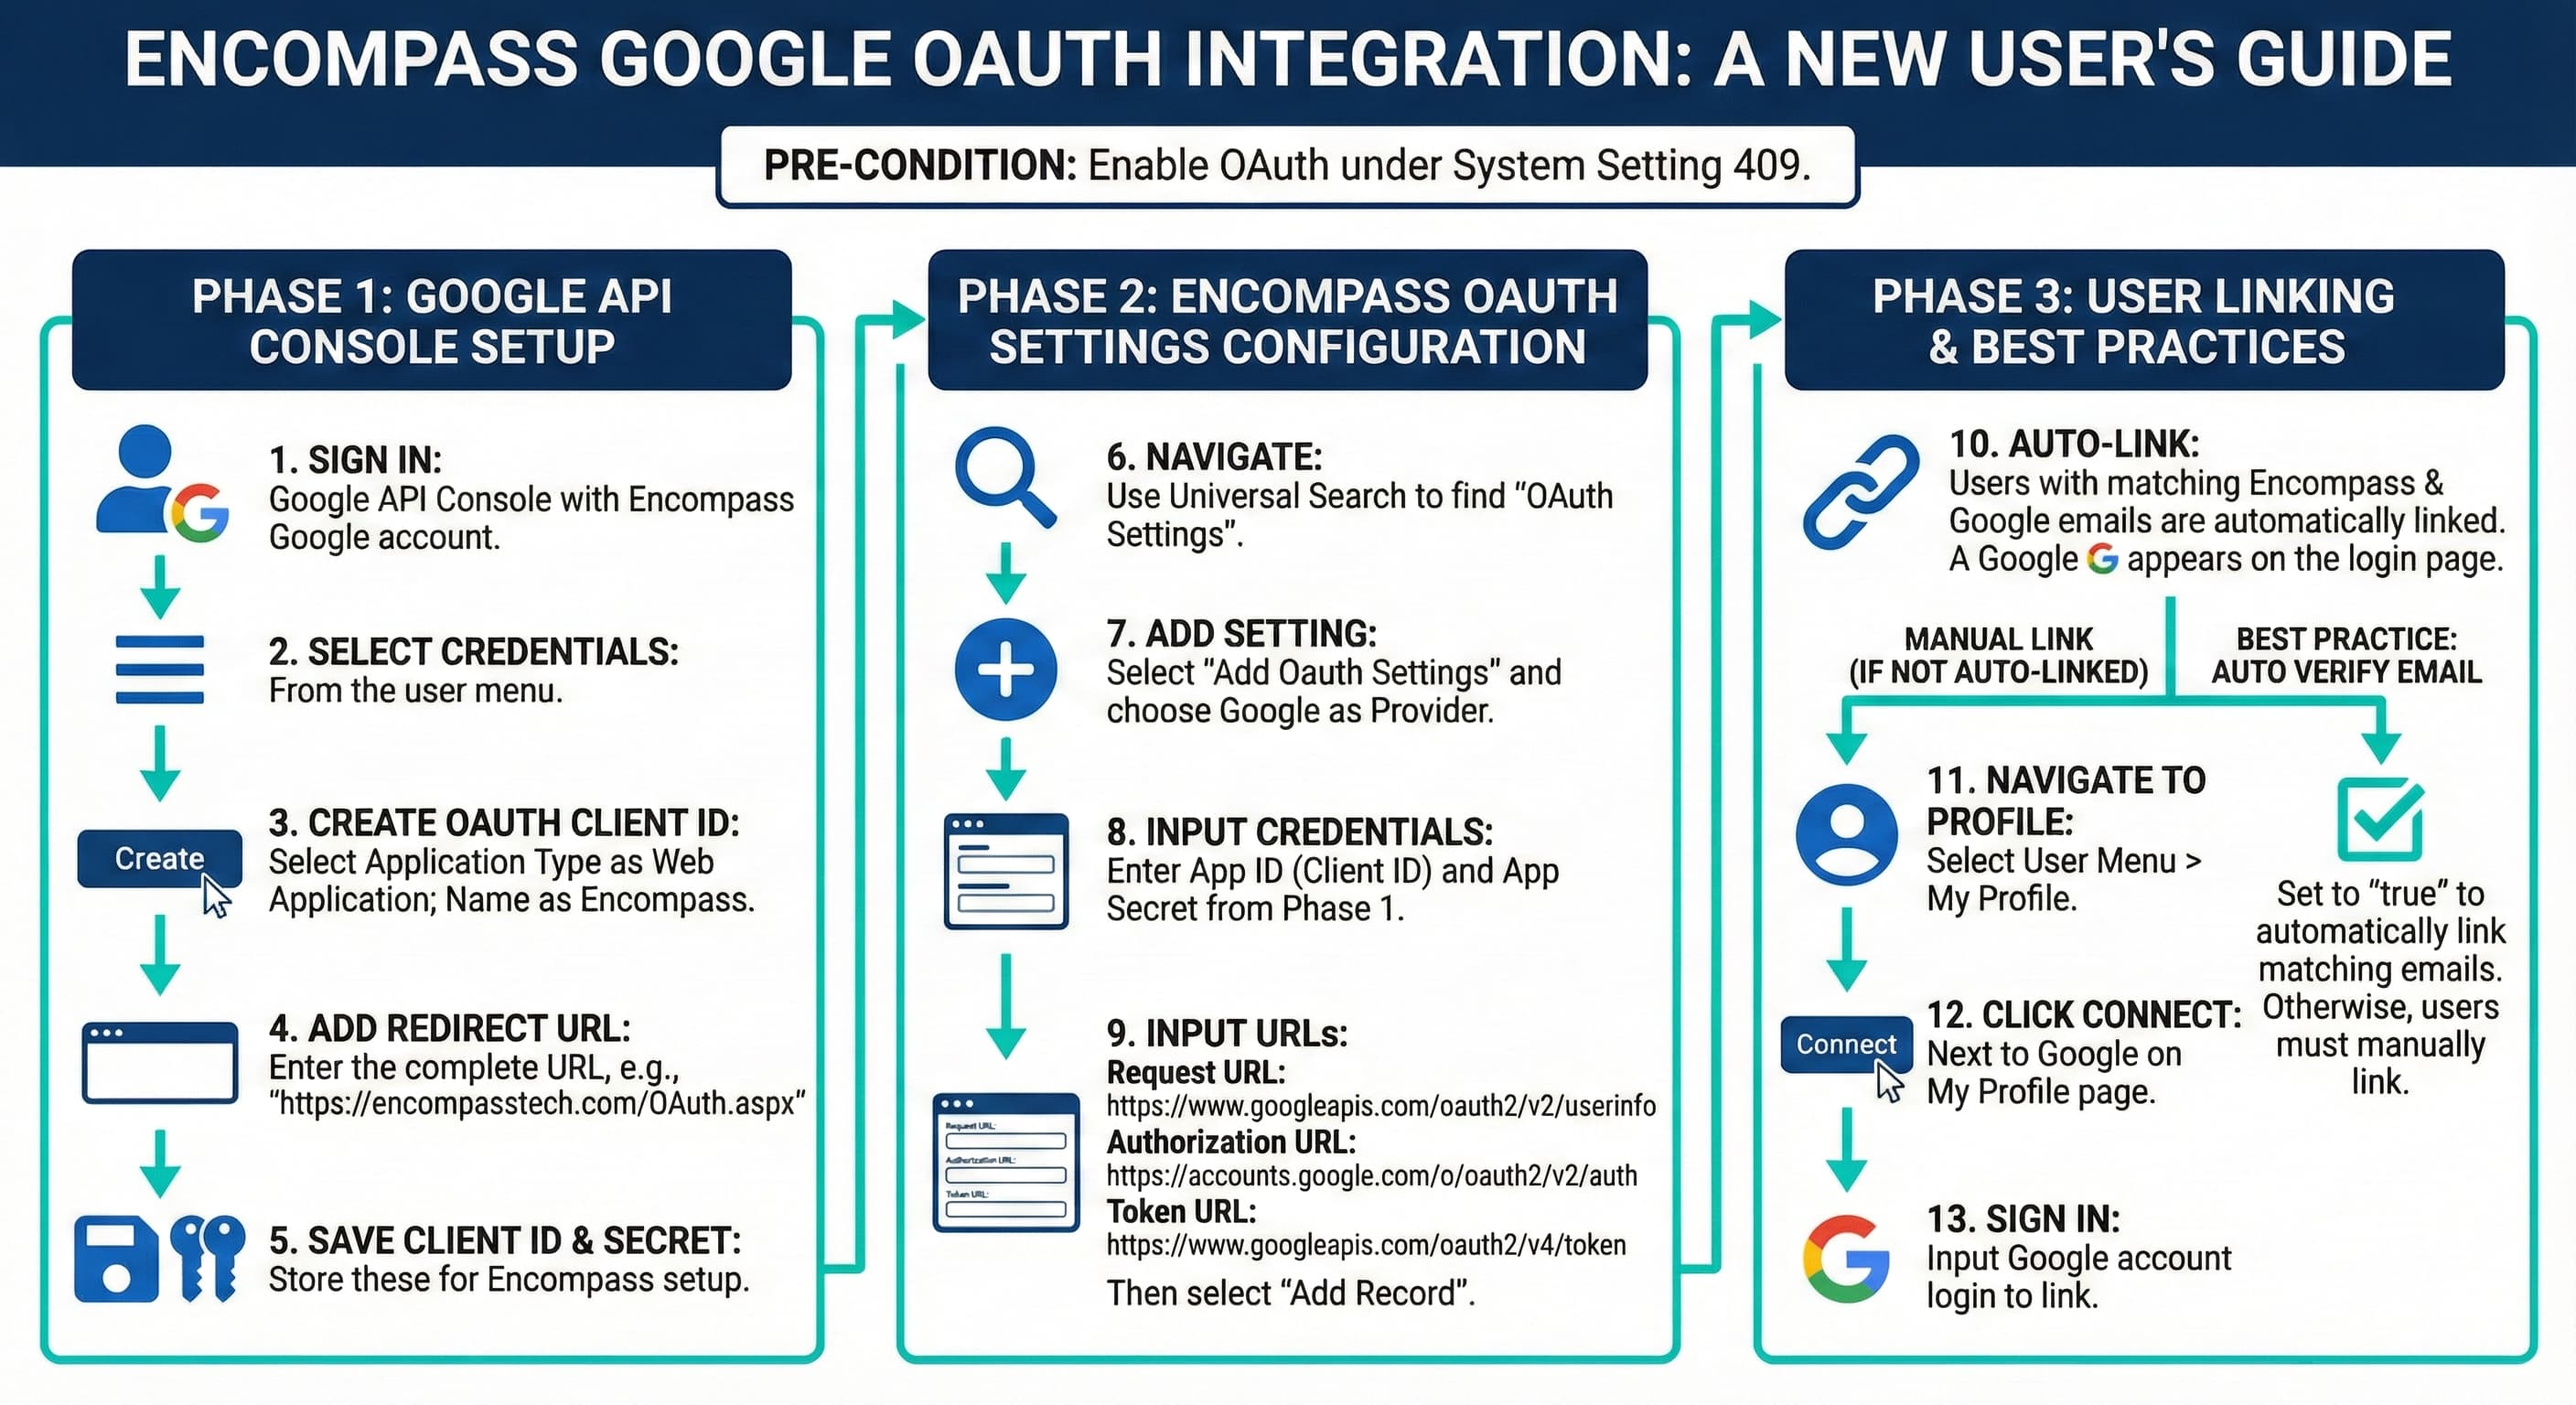
How to Turn on Google OAuth
1. Sign in to the Google API Console using your Encompass Google account.
2. Select credentials from the user menu.
3. Select Create Credentials and then OAuth Client ID.4. Select Application Type as the Web Application field and Encompass for the Name Field.
4. Add the complete URL of your site with respect to the OAuth.aspx page.
6. Save the generated Client ID and Client Secret to use during the Encompass setup.
7. Using Universal Search, navigate to the OAuth Settings table and select Add Oauth Settings.
8. Select Google as the service provider, then input the App ID and App Secret from step six in the record fields.
9. Input the required URLs into the record fields then Add Record.
Request URL - https://www.googleapis.com/oauth2/v2/userinfo
Authorization URL - https://accounts.google.com/o/oauth2/v2/auth
Token URL - https://www.googleapis.com/oauth2/v4/token
10. Users with the same Encompass and Google email will automatically have them linked.
A Google icon will appear on the login page.
11. If the user Oauth does not auto-link select the User Menu at the top right to navigate to My Profile.
12. Click Connect next to Google on the My Profile page.
13. Input the Google account login to link with Encompass Oauth.
Best Practices
Auto Verify Email
- Leaving true will automatically link the login for any Encompass users whose Google email matches the email on their Encompass user account
- All other users can manually link their Google account to their Encompass login via the My Profile dashboard